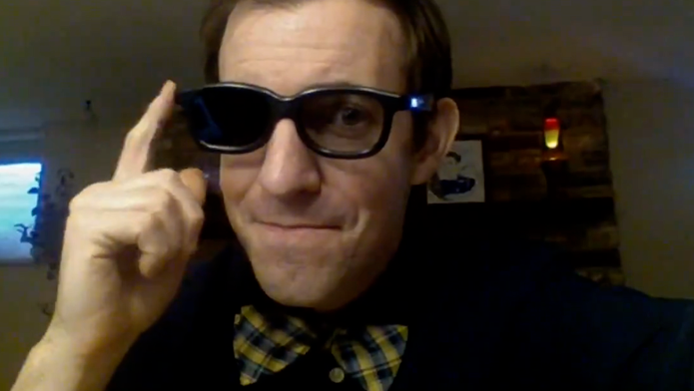
One of the things that I was bummed about during the online learning of COVID is that students would never get to see what it looked like to look through a polarized filter. Then, during our google meet, I tried holding a filter up to my webcam and it was not only good, but in some ways, it was actually a cooler experience than when I had done it in person ;) Pirate PolarizersIf you've ever gone to a 3D movie in the theaters, you've had the opportunity to experience polarized 3D glasses. Now, these lenses are circularly polarized which is a slightly different technology than the linearly polarized lens that we talk about in class but for this demonstration, it doesn't really make a difference.
Click for more Waves resources ⬇
Comments
Files
Materials
To Print
Wave Transparency Assembly
Note: It is most fun and meaningful to be the one actually doing this activity, so it is recommended to make groups as small as possible (ideally working in pairs) so that there isn’t a lack of materials to interact with Investigation
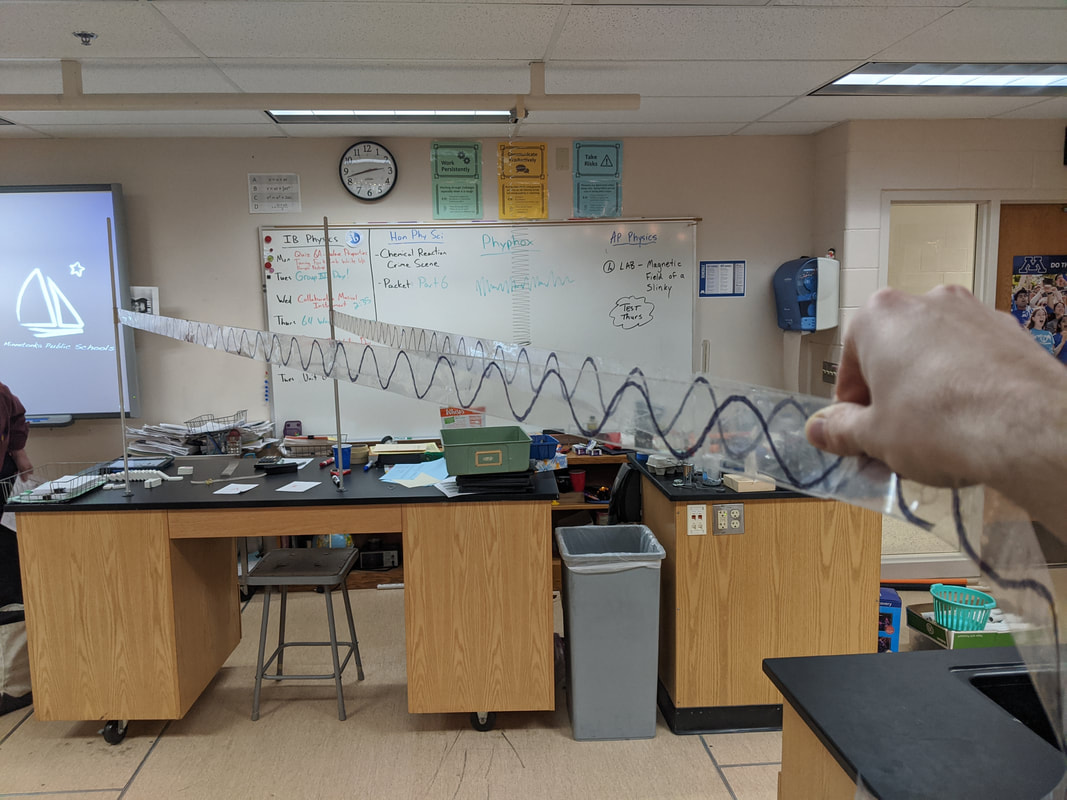
Large ScaleMy favorite spin that I've done on this activity is to create a large-scale version of the set up so that I can demonstrate in a classroom sized apparatus. I made this by using toilet paper rolls in the place of straws and packing tape that I carefully doubled up to eliminate the adhesive. I then printed out a sine wave of the desired size and traced it a couple of wavelengths at a time with a permanent marker. Click for more Waves resources ⬇
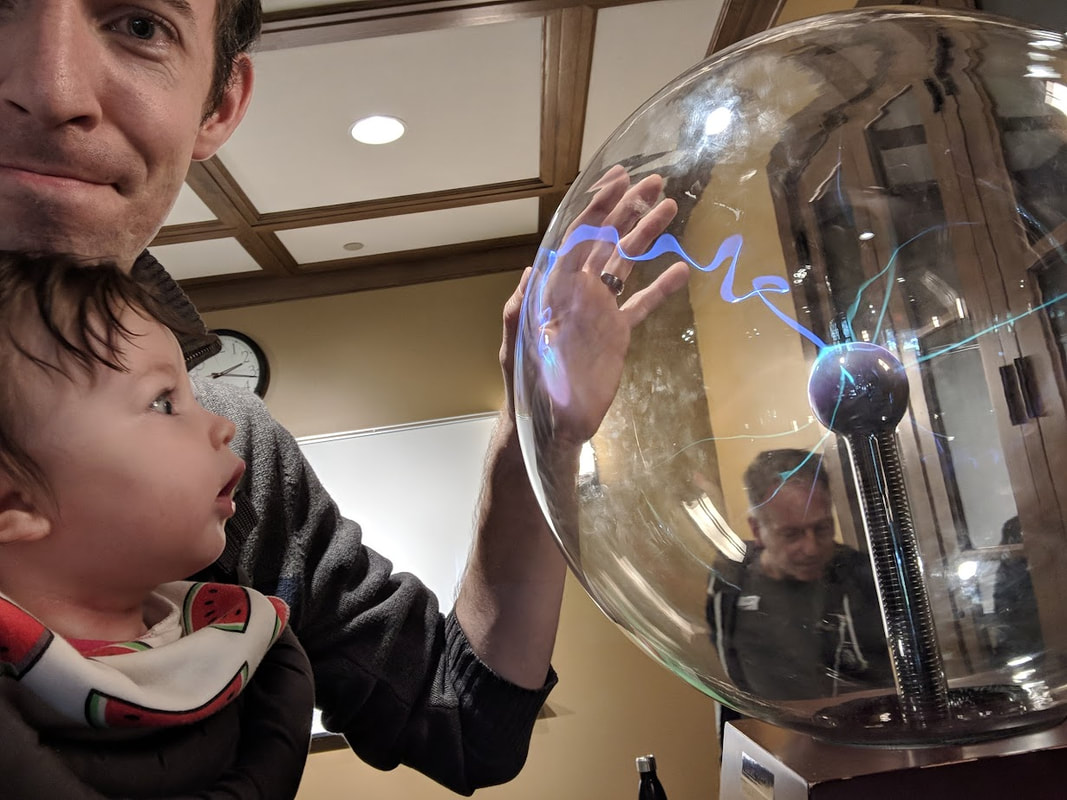
Fluorescent BulbA classic plasma ball trick is to show how the electric field doesn't actually stop at the glass dome even through that's where we stop seeing it. To make this visible outside of the globe, all you need is a fluorescent light bulb. Any bulb will do but I'm partial to a 12" tube like this one on Amazon. Once it is close enough to activate, it glow just it would in a light fixture! If you have a tube like mine you can even play around with holding it in different places along the bulb show how the charge follows a path to ground rather than illuminating the full bulb. Long Distance GroundingThe most impressive demo in my opinion is to light up a fluorescent bulb using the plasma ball without ever holding it close by. To do this, find a way to insulate yourself from the ground by getting on a wooden chair/table or plastic stool. Once insulated, touch the plasma ball with one hand. With the other hand, hold one end of the lightbulb and touch the other end to a path to ground, this could be a sprinkler head, faucet, or even someone else who is grounded :) To really show that it is the plasma ball as a the source of the power, tapping out a pattern will result in synchronous flashes of light. Plasma PennyEvery year, I have a handful of students that are disappointed that they can't "feel" the shock of the plasma ball in the same way that they do with the Van de Graaff Generator. To help give them this experience, at the end of class, I put a penny on top of the glass globe and power on the plasma ball. When you bring your hand close to the penny, electricity arcs to your finger in a decently painful zap. You can even arc through a piece of paper or post-it and create burn marks. I don't recommend smelling your finger afterward though. It'll give you just a hint of "burning flesh"... Click for more Electricity resources ⬇
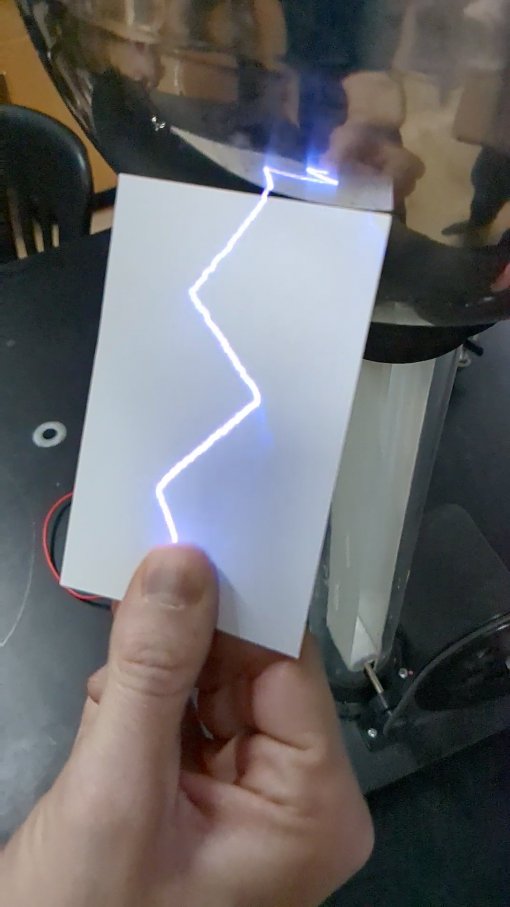
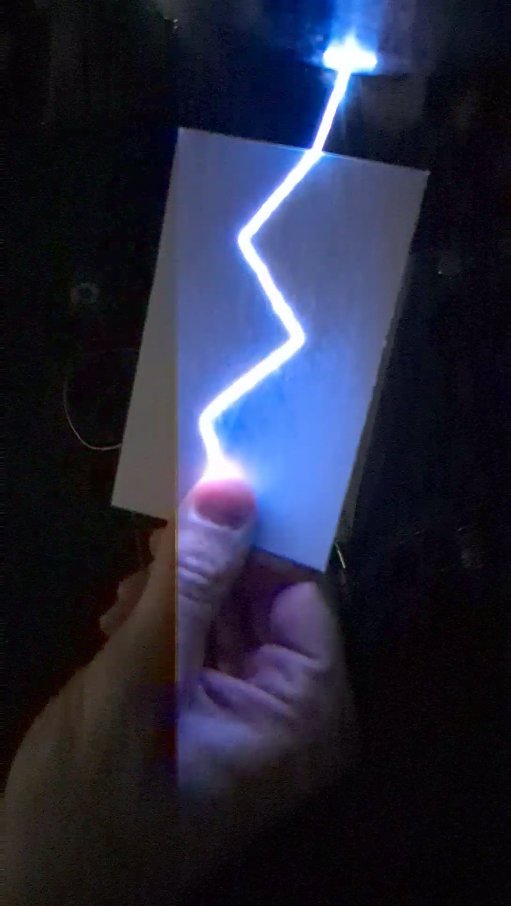
One day when we were getting the Van de Graaff generator out for some static electricity demos, one of my colleagues shared one of the coolest things I've seen. Rather than discharge the voltage build up through a finger or knuckle, he had students draw pictures on notecards using standard graphite pencils and held them up to the generator to create a path to ground through the graphite. The result is an impressive spark (larger build up with the greater gap) that followed the path drawn.
To try this out, I drew a simple lightning bolt zig zag on a piece of paper. Holding one end of the drawing firmly with my thumb, I then held up the other end of the graphite line while charging up the Van de Graaff. The result can be seen in the video that my colleague and I captured below. I think we should refer to this as "Van de Graaff-ite" ;)
If you capture it in slow-mo you can get pretty impressive frames showing exactly how the discharge is following the graphite! It's basically instantaneous and while you can see it in real time, there is just something special about seeing the path that electricity is taking
Troubleshooting
In my experience (and hearing from others who have tried) this demo doesn't always work on the first go. I am limited to the experience that I have with our equipment but here are the troubleshooting steps that are worth trying
Disclaimer
As with any Van de Graaff generator demonstration, it is important to understand the safety considerations. There are some great resources through Flinn and IOP.
Iterations
One of my favorite parts about Twitter is how easy it is to share and "remix" an idea. After sharing the video posted above several months ago, several other teacher have tried this out and put their own spin on the concept. Some of my favorites are included below:
Click for more Electricity resources ⬇
With this simple set up, observers will see the balloon on the ceiling and assume that it must be filled with helium. If the charge is strong enough (and the air dry enough), you can even use the string to pull it down a few centimeters and if the balloon will jump back up to the ceiling. Finally, once everyone is convinced that the balloon is filled with helium, pull the balloon down just enough so that the electrostatic charge is too weak to support the weight of the balloon and it sinks like the air-filled balloon that it is :)
Click for more Electricity resources ⬇ |

Joe CossetteFather, Physics Teacher, Knowles Fellow, Friend, Techie, and Musician Blog Posts |
|||||||||||||||||||||||||||||

 RSS Feed
