|
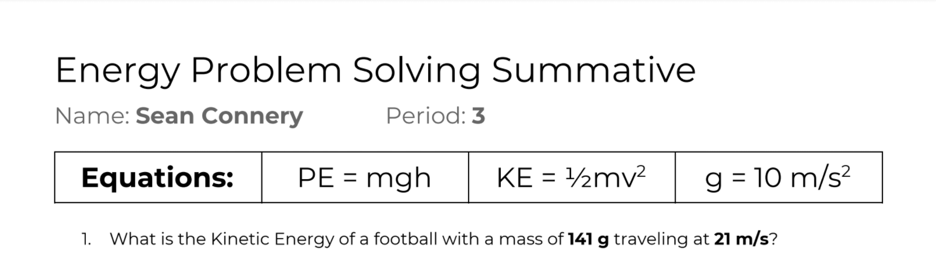
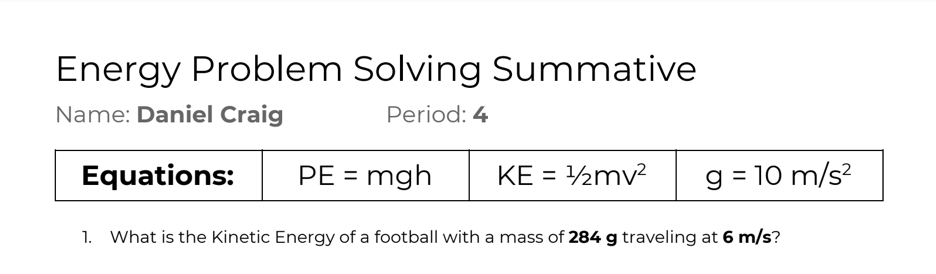
Teaching online has introduced many new wrinkles in the way that we do things. One of the most challenging disruptions has been with assessments. I decided at the beginning that I wasn't interested in fighting the battle of policing students and locking down ways of accessing resources or sharing answers in the virtual setting so I needed a different approach than simply sending out identical copies of the exams that I typically give. There are great approaches to tackling this issue including video assessments (props to Rhett Allain) and design problems (blog post coming soon) but with the number of students that I have and the amount of content that I'm hoping to assess, I knew that these weren't going to cut it. My solution?? Using a mail merge to ensure that every student has their own unique answers :) This blog post is designed to walk you through how you can do this too. Buckle up!! 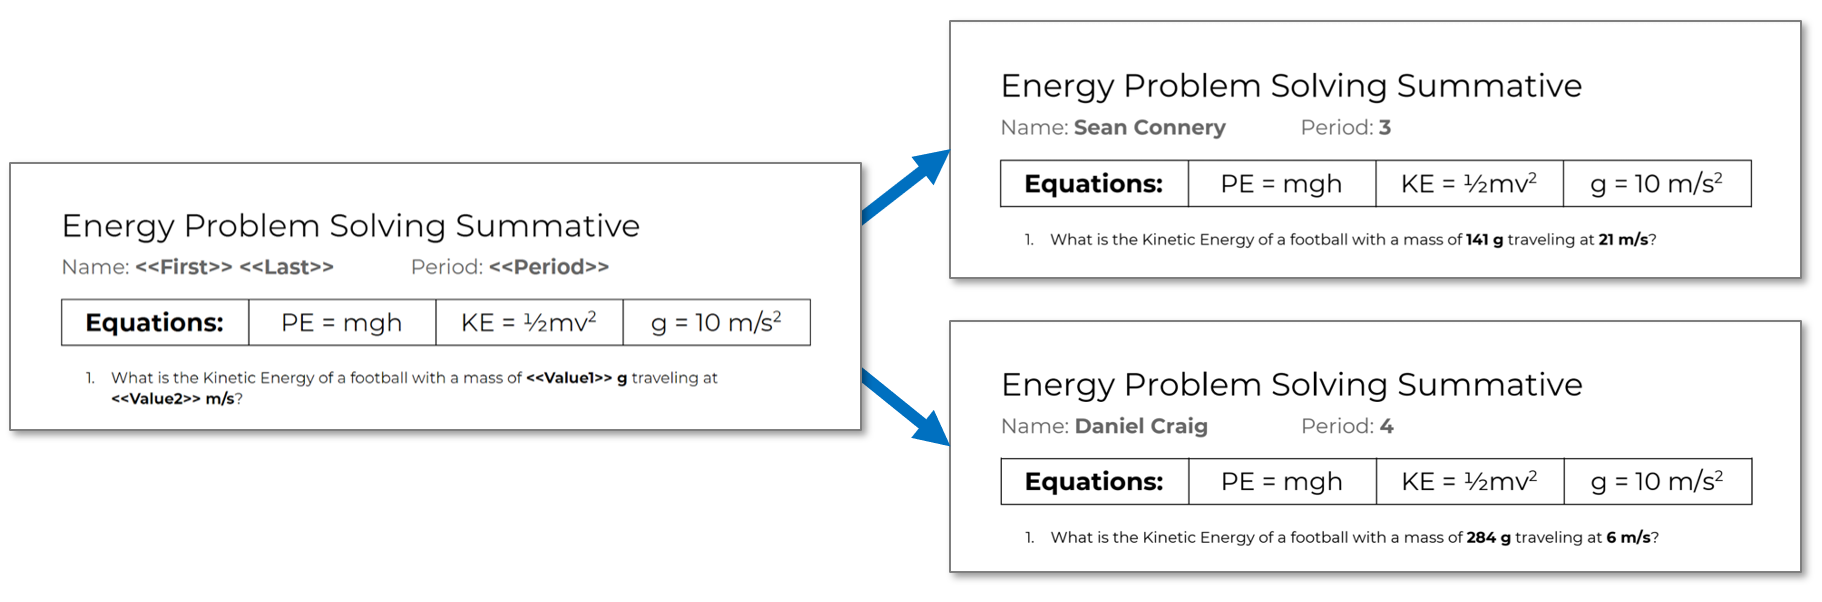 What is Our Objective Here?The final goal of this process is to create unique assessments for each student. This is especially useful for classes like physics where values can be modified to change the answer but maintain the same question structure and skill that is being assessed. This is different than online quizzes that can randomize because it is a personalized pdf for students to show their work and record their answers. From the tests that I have done this way, student's have been really positive about the experience and have mentioned that it has a strangely calming feeling of normalcy in an age where everything about school seems to feel out of the ordinary. Video TutorialIn this video, I walk through the process from beginning to end. The detailed steps are written out in the sections below. Step 1: Create a TemplateMost of the assessment is going to look the same from student to student so we are just going to use the mail merge to tweak little details in the questions. Because of this, a good place to start is to just write or update an assessment without any fancy features to use as a starting place. 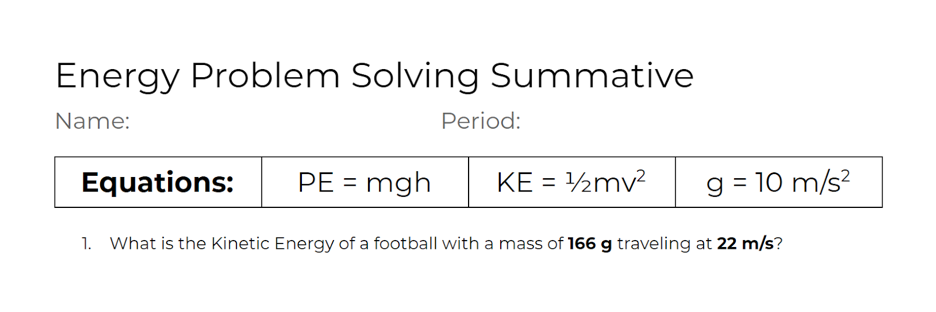 From here, we need to create tags for the mail merge to know where to add in the unique words/values for each individual file that we will be creating. A tag is just a word that is surrounded by << >> brackets. The word that you use doesn’t have to be something too fancy, just something unique that you will be able to use to point the mail merge to later on. In the example below, I have added in tags for the first and last name, class period, and the two numbers that show up in the first problem. 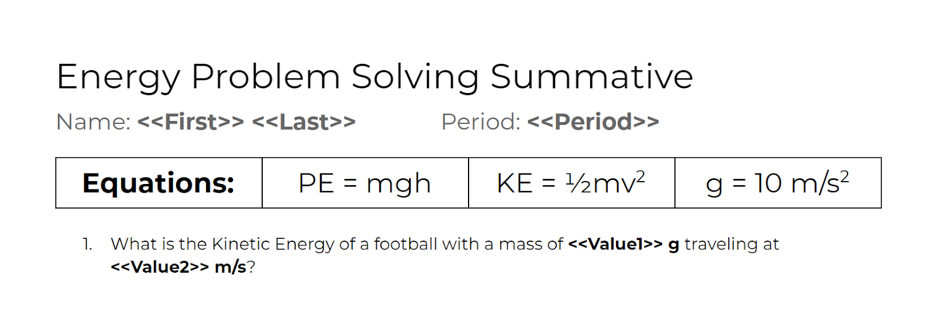 Step 2: Create a Spreadsheet with Class ListCreate a new spreadsheet in google sheets and locate a class list. In order to give every student their own version of the assessment, you need to have a row of basic information for every student. In the example below, I included the teacher name and period along with the student name to make things easier to organize later on for multiple sections. 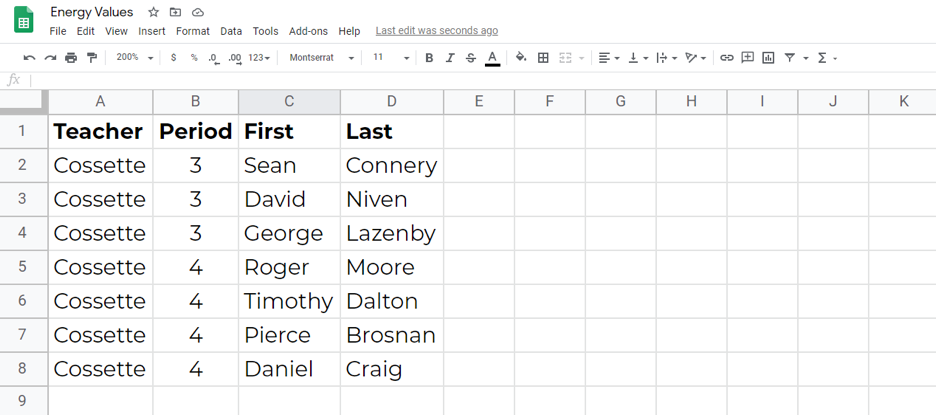 Step 3: Create Random ValuesTo make the questions different for each assessment, you will need a unique set of values for each student. Since most of the classes that I do this with have potentially hundreds of students, I think it is a good time to use a little spreadsheet magic :) In this same Google Sheet that contains the class list, open up a separate tab and make a column for each of the of values that you called for in the template from step 1.  Rather than just set it up with a truly random number, most problems call for a certain range of values that could be considered reasonable. For example, in the template shown in step 1, the <<value1>> tag represents the mass of a football in grams so there are certain limits that we should probably abide by. ;) To make this happen use the formula “=randbetween(low,high)”. To give values between 100 g and 300 g, just write “=randbetween(100,300)” and copy it down to create the same number as students you will need to make assessments for. 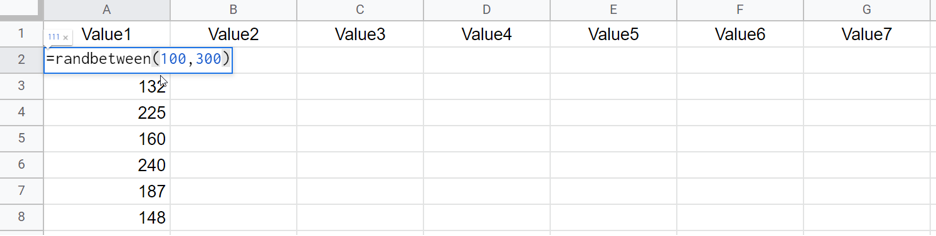 *protip: the randbetween formula only outputs perfect integers so if you want a number with decimals, just divide by 10 or 100. For example, Value6 below outputs a number between 2.0 and 5.0 with one decimal place 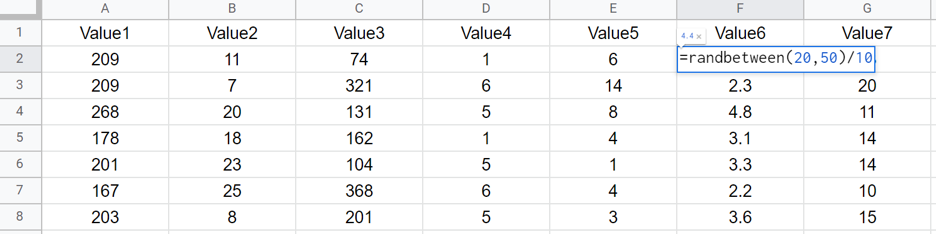 Step 4: Copy Values into the Class ListNow that you have a set of random number generators programmed and ready to go, we are going to lock in the values by copying the list over to the main tab with all of the students. When pasting the values into place, you need to paste special so that you paste in the “values only”. This is very important because if the random number formulas are part of this sheet, it will generate new values each time the mail merge completes a row and will mess up your record of what the assessments actually contain. If you ever want to go back and reference the "randbetween" settings that you used to produce a set of values, you still have access to the tab that you used to create them in the first place. 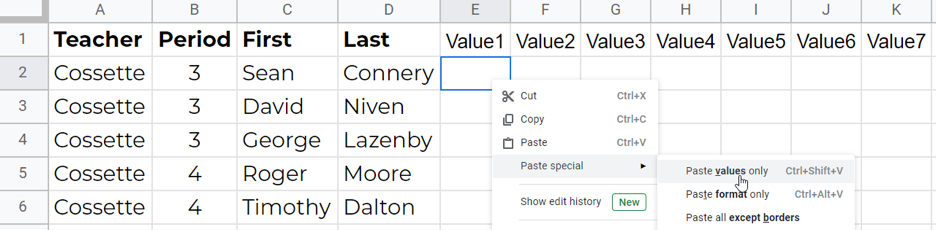 Step 5: Create an Answer KeySince every student will have different answers, it is super important to create an answer key for any calculation problems so that you don’t have to take each test yourself before grading. For this first question “What is the Kinetic Energy of a football with a mass of <<Value1>> g traveling at <<Value2>> m/s?”, the kinetic energy can be calculated by creating a formula referencing value 1 and 2. (Note, the /1000 in this case is to convert the grams into kilograms before using 0.5mv²) 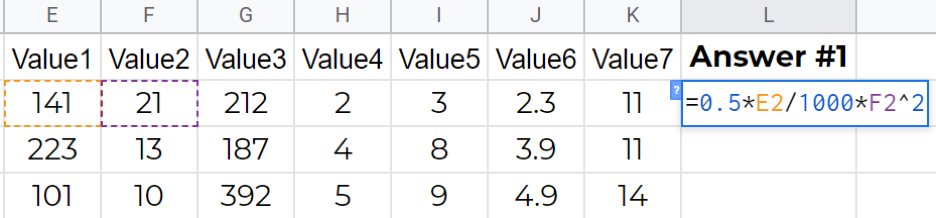 My personal preference is to create the answer key calculations while I'm setting up the random number formulas. This way I get a feel for how the different combinations of random values interact and if they result in realistic answers based on the scenario. Step 6: Mail Merge Set UpAfter the class list, random value, and answer calculations are done, you might have a spreadsheet that looks like the one below. 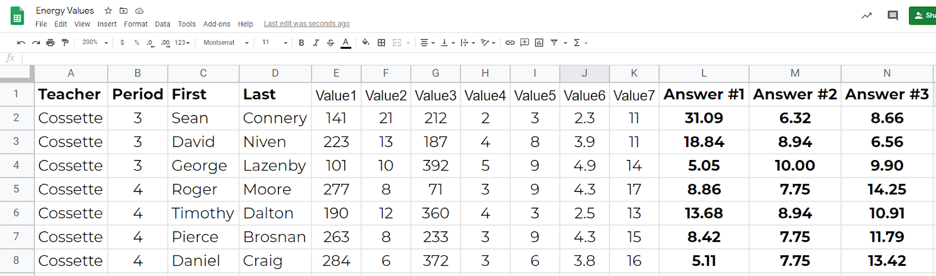 To kick off the mail merge, I use a google sheets add-on called “Autocrat”. If you don’t have it installed already, you will need to get it by selecting “get add-ons” in the Add-ons menu. If you have it already, just click on “Open” as shown in the screenshot below. 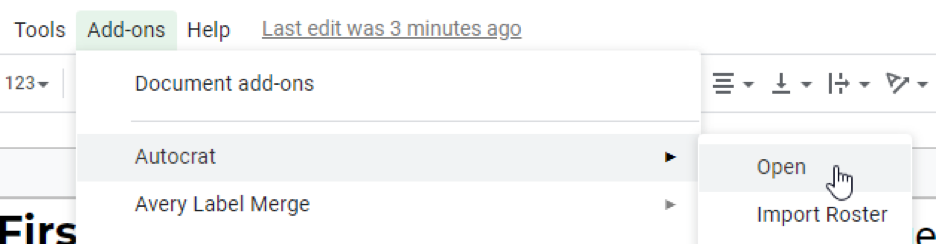
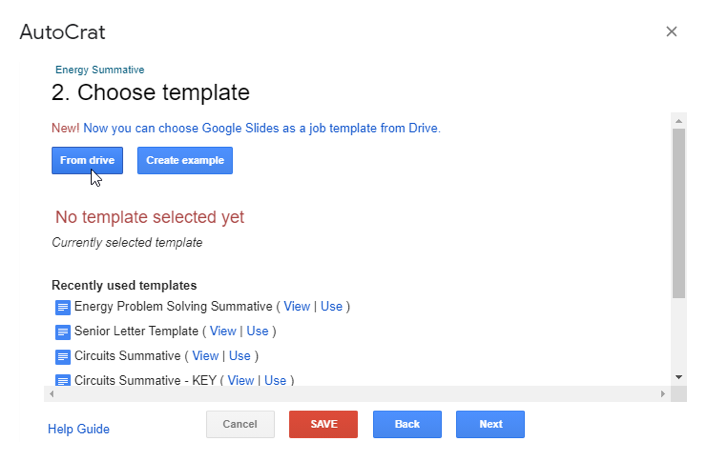
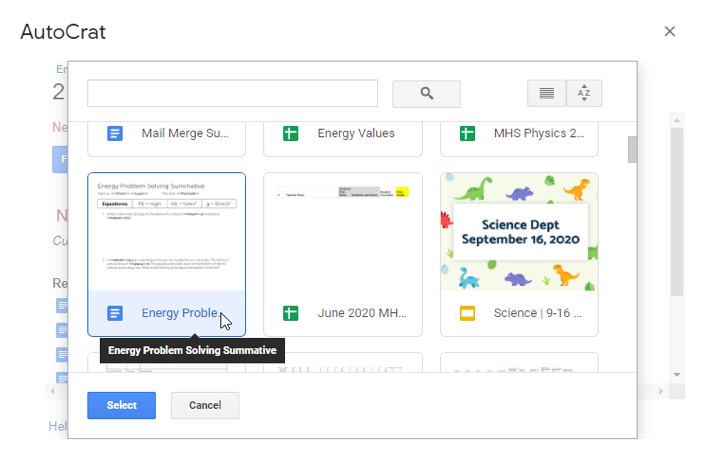
1. Name your merge job Give the job a name that you will recognize if you need to come back and create more versions 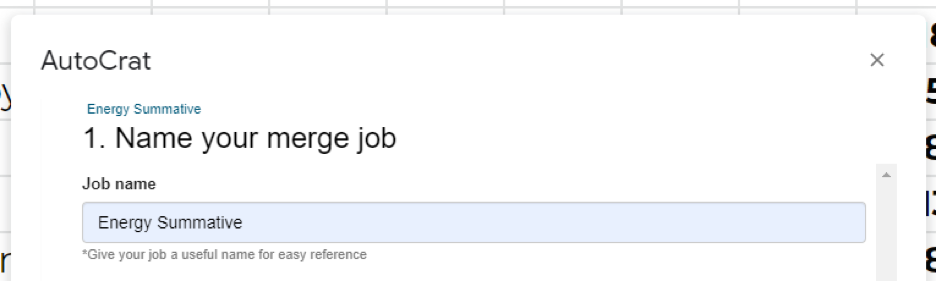 2. Choose template Choose a template from drive to select the template that you made in step 1 and click "Next"
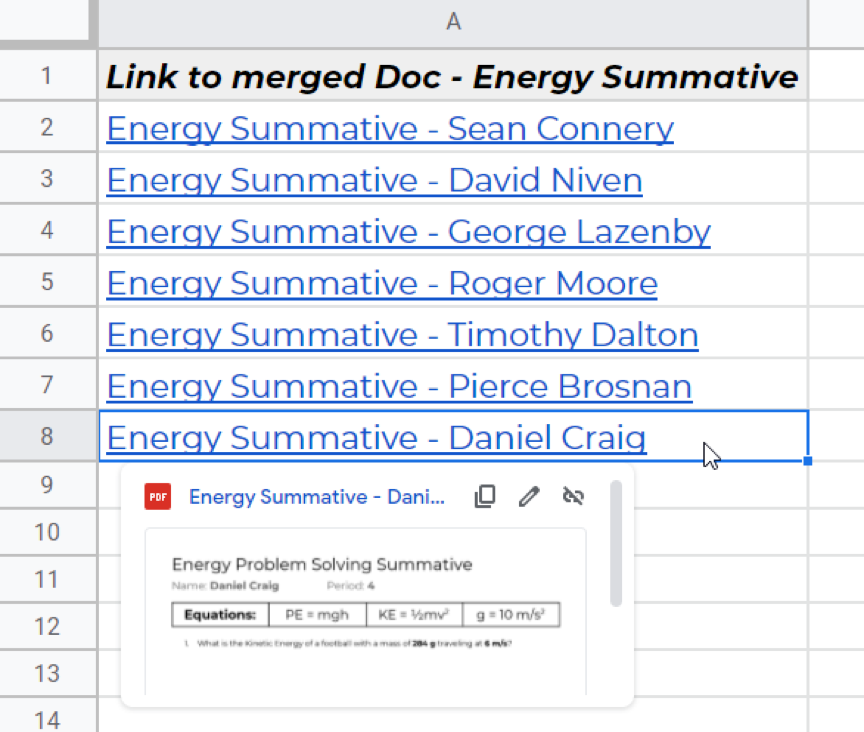
3. Map source data to template Select the tab that contains your class list and values to be merged into the template. I tend to leave my tabs unnamed so be careful to select the right one. 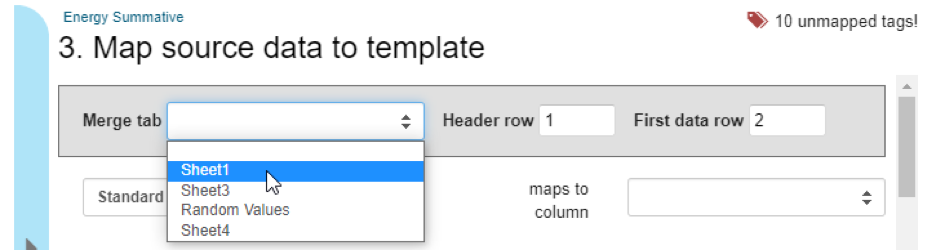 If you have named your <<tags>> in the template the same way that you have named the columns in your spreadsheet, most of the mapping will be done for you, but you should go through the list of tags to make sure that all of the data will be sent to the right places. 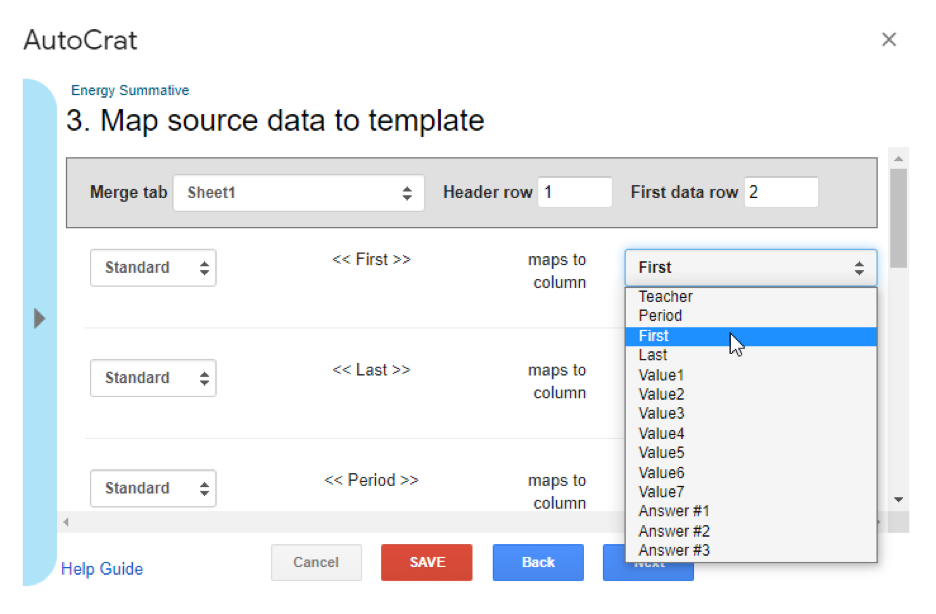 4. File settings In the file settings, you will want to include a template for how you want the files to be named. I recommend using tags from your spreadsheet to personalize the filenames. To do this, just include the tag using the << >> brackets the same way you did in the template. I usually have the program create PDF files but you can also have it create a bunch of individual google docs. 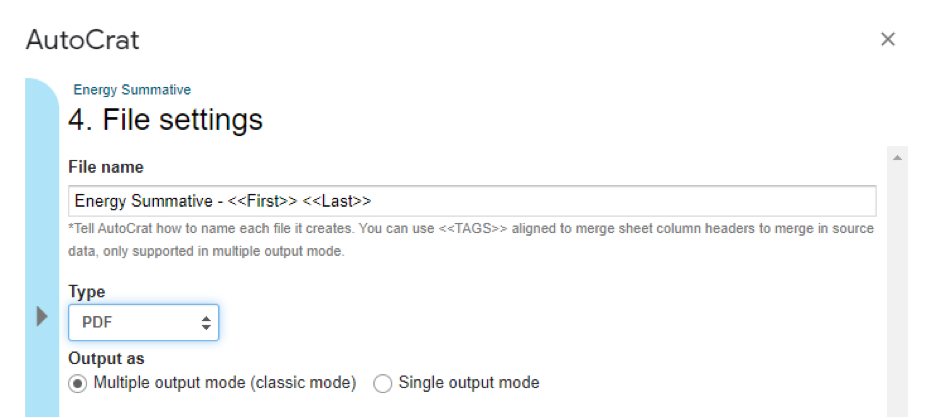 5. Choose destination folder(s) Make a Google Drive folder dedicated for storing the files that are created. You won’t really need to go in there, but that is where the files will live. If you have a lot of tests that you will be making it's best to have a dedicated folder just for these files rather than the same directory as your template and data values spreadsheet. 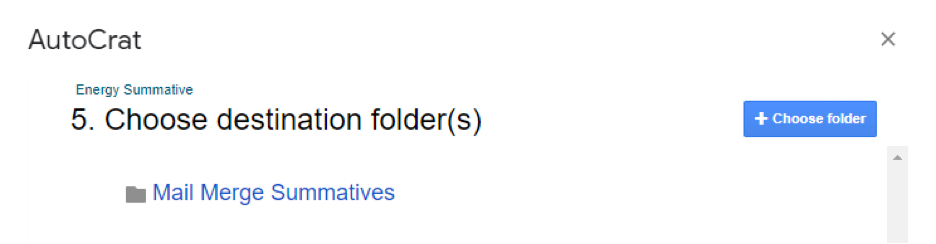 Hit Save to exit back to the main menu (the last pages are more advanced features that you probably won’t need this time). Step 7: The Test RunBefore doing a full run, it’s a good idea to have it create a sample so that you can verify that all of your tags mapped the way that you had intended. To do this, go back to the main menu and click on the eye icon for the job that you just created. 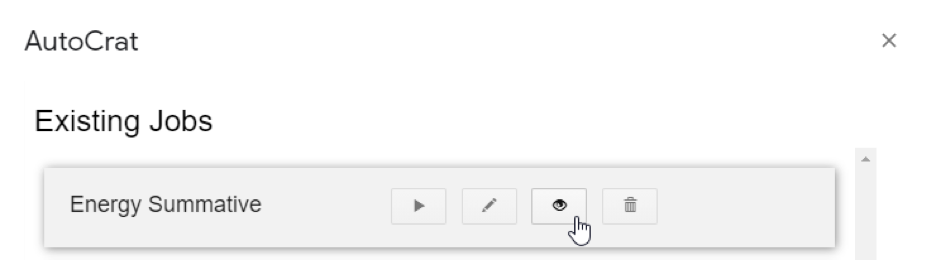 It might take a few moments for the blue “Preview for a first mergeable row” button to become active but once it does, click it to create your sample. 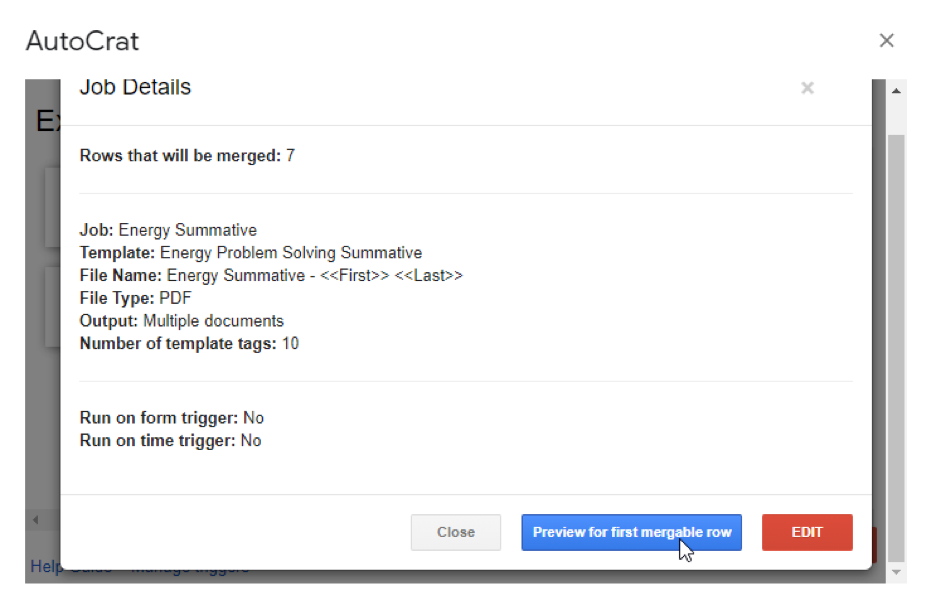 Once your preview has been created, look over the file thoroughly to make sure that all of the tags merged correctly. The most common things that I've noticed is that I'll either have a small typo that disrupted the merge entirely for a tag or two or the formatting broke once the values were merged in. You should also check that the title tags merged in the way that you were expecting them two in the name of the file. If you do have any adjustments to make to the template or data values, be sure to come back and preview again to ensure that your changes fix the problems. Step 8: Run the MergeAssuming that everything checks out and the sample looks the way that you expected it to, choose the play button on the main menu to run the mail merge for all rows of data in your spreadsheet. (This might take a while if you have lots of files to create) 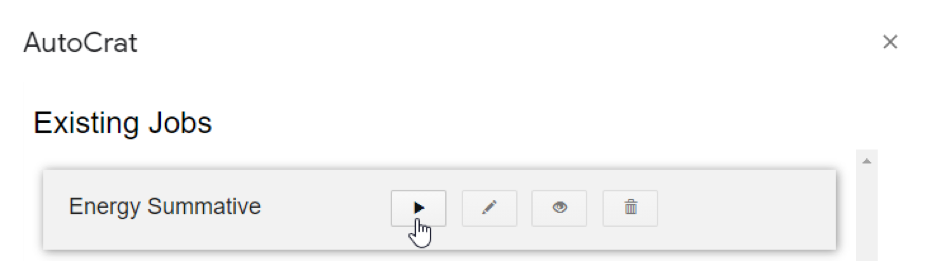 Step 9: Share the FilesAfter the mail merge finishes, you will notice that four new columns have been added to your spreadsheet. The one that you really want is the “Link to merged Document”. Copy this entire column to a new google sheet or google doc that you can share with students. 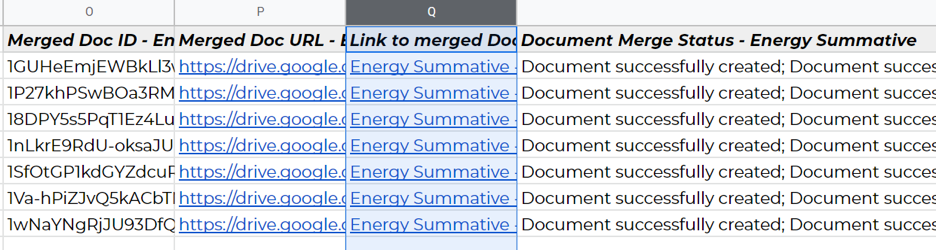
Each student’s file already has their name on it and includes a unique set of values for each of their problems. This will prevent students from simply sharing final answers and force them to focus on the steps to get there.
Step 10: Submitting and GradingStudents can just annotate their pdf, print it out, or answer questions on notebook paper. When done I have my students submit their completed assessments to me on Schoology (other learning management systems like Google Classroom or Moodle should work fine for this too) When you get to grading, don’t forget to use the answer key that you created back in step 5 . If you make your spreadsheet in alphabetical order, grading actually goes pretty quickly because most programs that collect submissions organize the files alphabetically too when you page through the submissions! ExamplesWhen starting a project like this, it's nice to have a couple of examples to give you a sense of what this can/could look like. Here are a couple of exams that I have created with this format so far. These range from short 2-3 question tests to comprehensive unit exams of 5 or more pages. Next Steps...This is still very much a learning curve for me but I'm excited about the possibilities that it presents even when we are back in person someday. Until then, I'm hoping to keep this going throughout this school year. It's definitely a lot of work up front but I think the product is good and assessments like these give me a pretty good picture of what my students are able to do.
I'm interested in other applications of this mail merge approach as well. Please reach out if you have any questions or ideas that you may have :)
Comments
|

Joe CossetteFather, Physics Teacher, Knowles Fellow, Friend, Techie, and Musician Blog Posts |
 RSS Feed
