Set UpPreparing a Lightbulb
Preparing the Microwave
 Running the DemonstrationOnce you have ensured that everything is set up correctly, you just need to run the microwave for 10 seconds or so and watch the light show. I still remember the first time that I saw this and how shocking it was to see the lightbulb lighting up all on its own with the contacts taped off. Click for more Waves resources ⬇ 
Comments
The Demo
This is one of the most amazing demonstrations that I've seen. Even though I know it's real, it still somehow seems like an animation of some kind. I've learned that the "wow factor" is about 1000 times better if you let students do this on their own rather than a teacher demo.
I use the following prompt when doing this as a station lab: "Use the tweezers to levitate Styrofoam beads in the standing sound wave (start by placing one bead in the center) and take a photo of your final configuration. (Please be careful with this set up - the electronics are precise & fragile)" The Materials
This has been on my project dream list for a while and it was finally possible with the right materials. I have purchased each of the acoustic levitation offerings listed at StirlingKit.com and they are both amazing.

The small model works right out of the package without any assembly required but it is limited in the amount that you are able to levitate. It isn't quite as impressive as the larger model but it doesn't require nearly as much technical assembly.
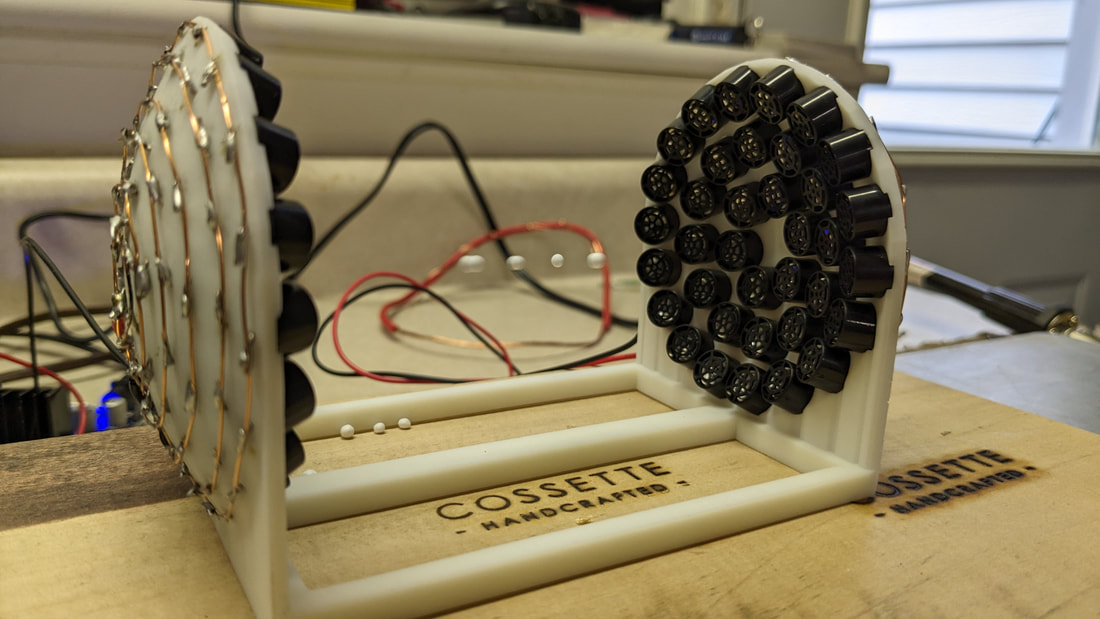
The larger model comes with the 3D Printed fixture, 72 ultrasonic speakers, and a board to drive it all. While this includes all of the materials, there is A LOT of assembly required!

One down, 71 to go...

Lots of installing and prepping the speakers. Each one has a polarity so the assembly is very detail oriented...

More soldering than I've done in my life! It might not look like it at first glance but the wiring is basically just connecting them all up in parallel with all of the positives connected to the red wired and negatives connected to the black wire.
Science Investigations
If you are looking for a little more than the fun and games of making things float, here are a couple of ideas to add a little more science :)
1. Using dry ice, Pat Counts was able to make the standing waves visible in a really cool way!
2. Dan Burns was able to measure the distance between nodes to calculate a frequency
Click for more Waves resources ⬇
Click for more Waves resources ⬇
 Infrared RemoteMany old remotes use infrared LEDs to transmit data in flashes that are invisible to the human eye. This light is in the Near Infrared part of the spectrum so not the range that is associated with thermal energy like the infrared camera below. Since this frequency is so close to visible light, some camera sensors actually pick this up. Specifically, I have found that most android phone cameras pick up this infrared signal and shift it to a visible color (usually light purple) when you look at the display. When you look at the end of the remote through the phone screen and hold a button, you should be able to see the infrared LED flashing out instructions for the receiver.
Infrared Thermal CameraUsing infrared to visualize radiant heat energy is a really cool application of electromagnetic waves. I've loved playing around with my FLIR infrared camera but I've struggled finding ways to make the experience more student lead. Recently, I've assembled a demonstration stations activity and used the infrared camera as one of the stations with questions for students to investigated. My favorite two investigations are: What can infrared light pass through? Try putting your hand in an opaque plastic bag What blocks infrared light? Take a selfie with someone wearing glasses
Click for more Waves resources ⬇
When I do this in my classroom, I turn off the lights and have stations set up for students to explore on their own. It is surprisingly satisfying to have glow-in-the-dark material leave such defined trails on command The Ultraviolet Source
The Canvas
Click for more Waves resources ⬇ |

Joe CossetteFather, Physics Teacher, Knowles Fellow, Friend, Techie, and Musician Blog Posts |


 RSS Feed
