|
A breakout task is an activity that brings the escape room experience into the classroom. BreakoutEDU has been a major player in this space, designing kits and activities for this platform, and served as the primary inspiration for this activity.
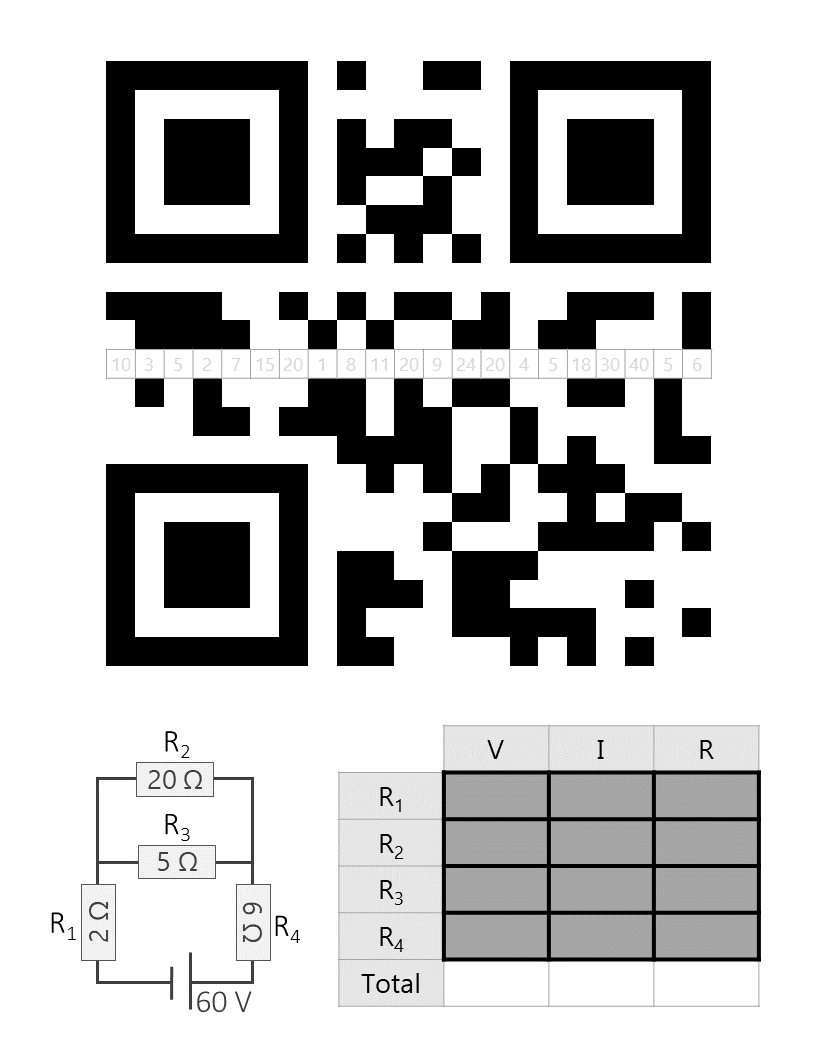
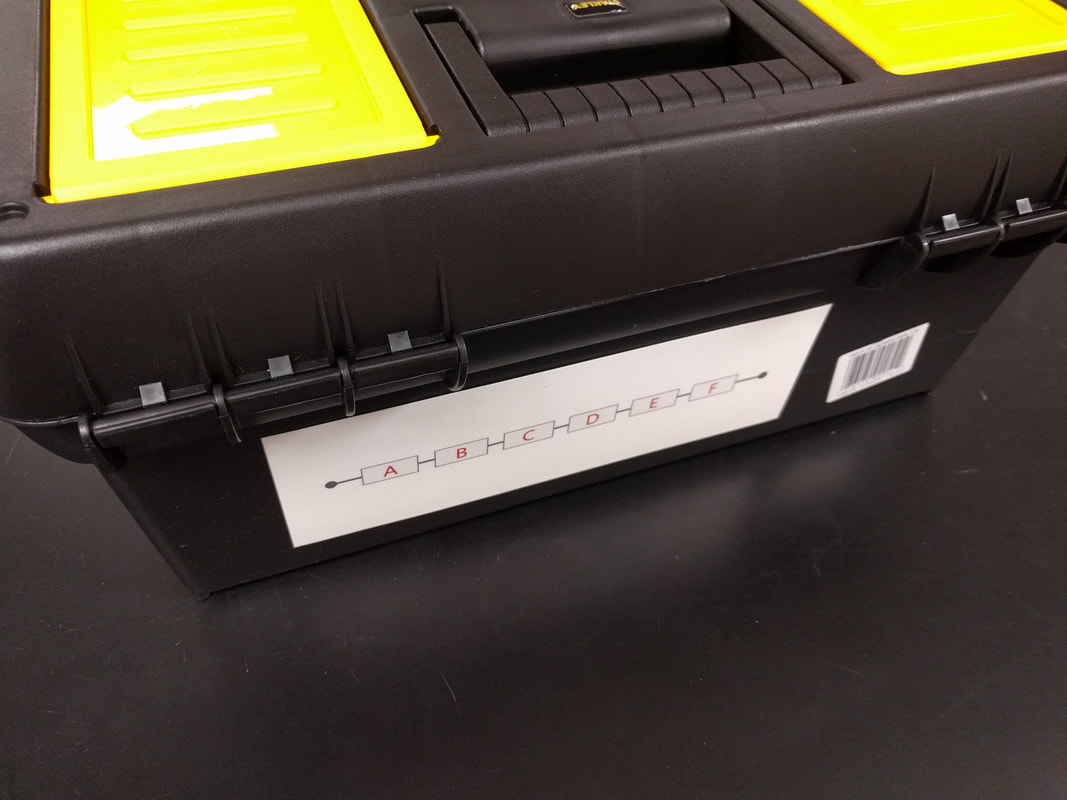
The ProcessThis task gets pretty involved to try to digest all at once (it is designed to take a group of students 40 minutes to complete after all!) so I have split the explanation into the 5 locks that must be cracked before the students can get the prize that is hidden in the main box. The clues are prepared in such a way that, while there are several paths that students can take, they don't have all the clues that they need for each lock right away. I have outlined the overall flow of the 5 different locks in the diagram below. As you can see, some of the necessary items needed to unlock the numlocks and keyed padlock are obtained only once the small box has been unlocked.  Lock #1 - Word Lock
*Tip: The new iOS11 has a QR reader built in to the camera application. My students we're delighted to find out that Snapchat works as well ;) Lock #2 - Small Box
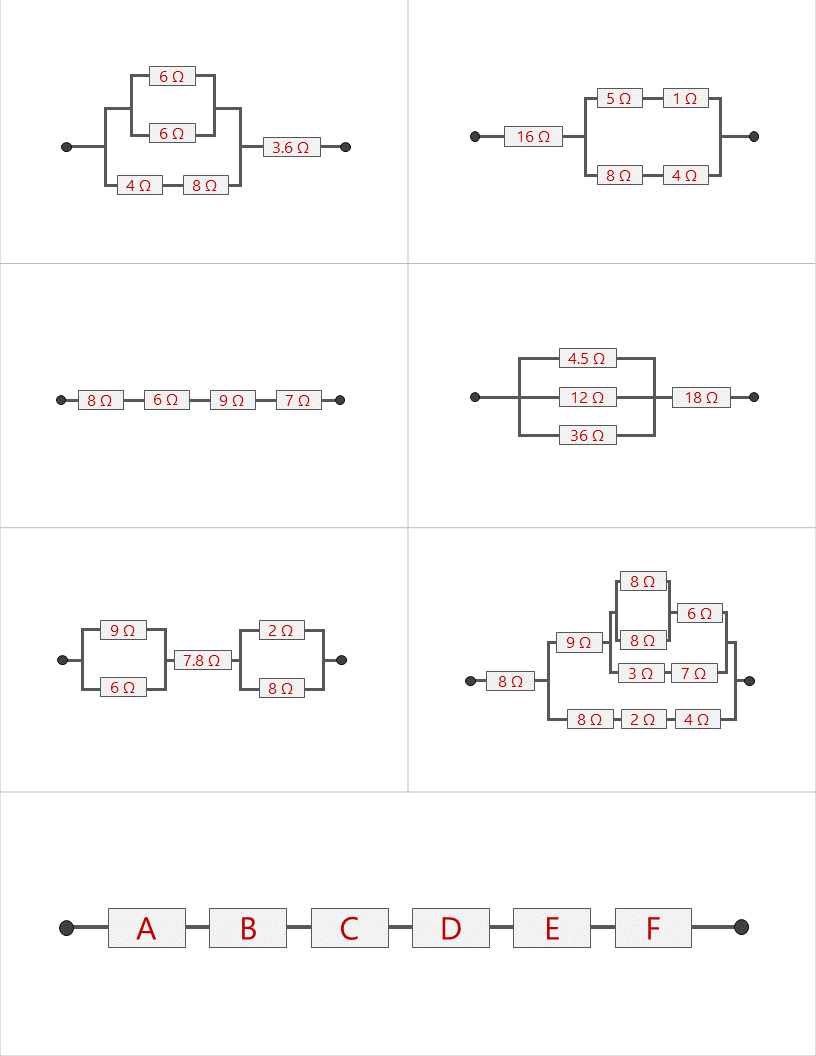
Lock #3 - 4 Digit Numlock
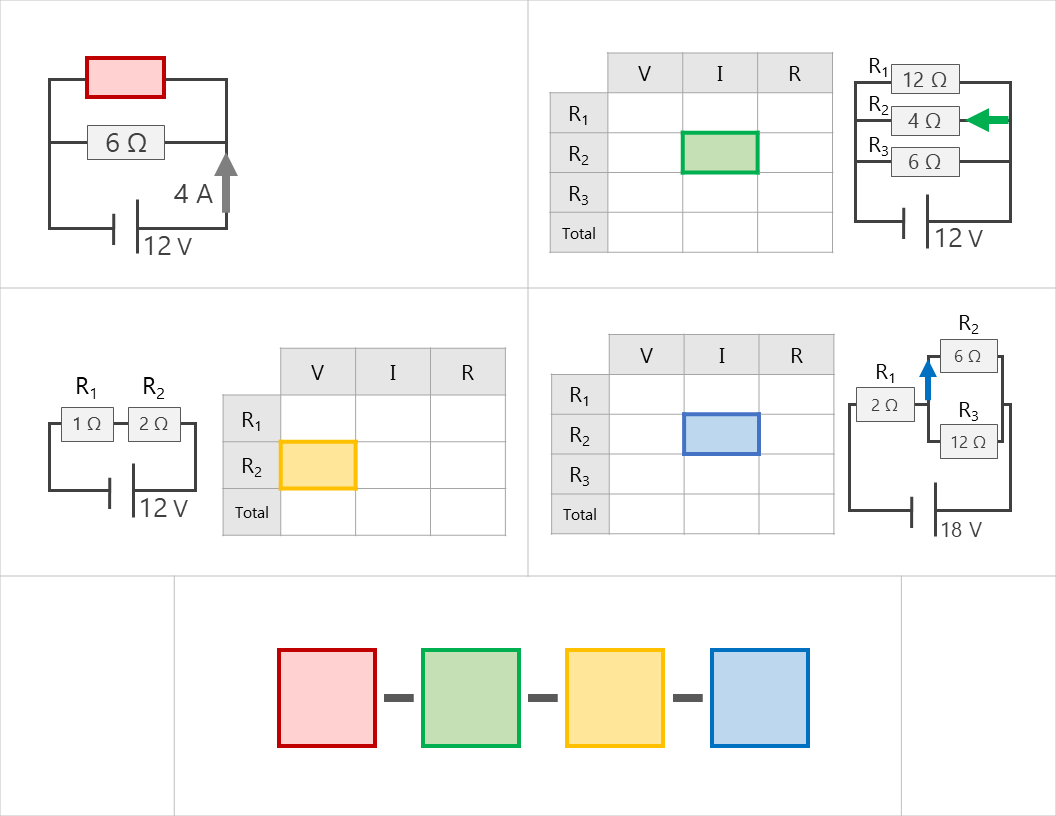
Lock #4 - 3 Digit Numlock
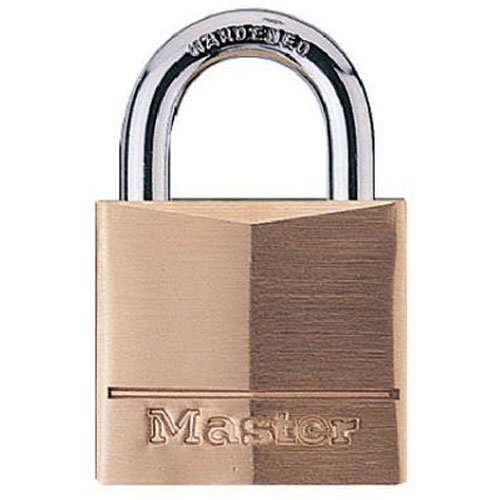
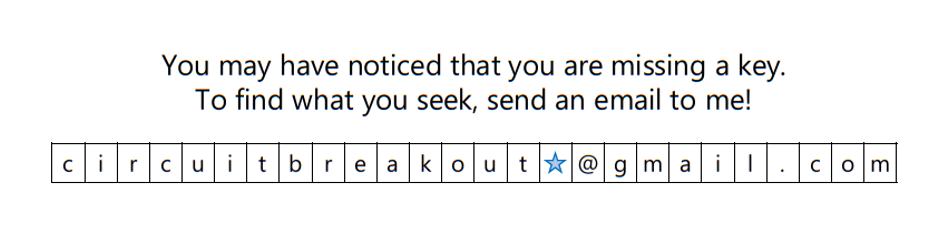
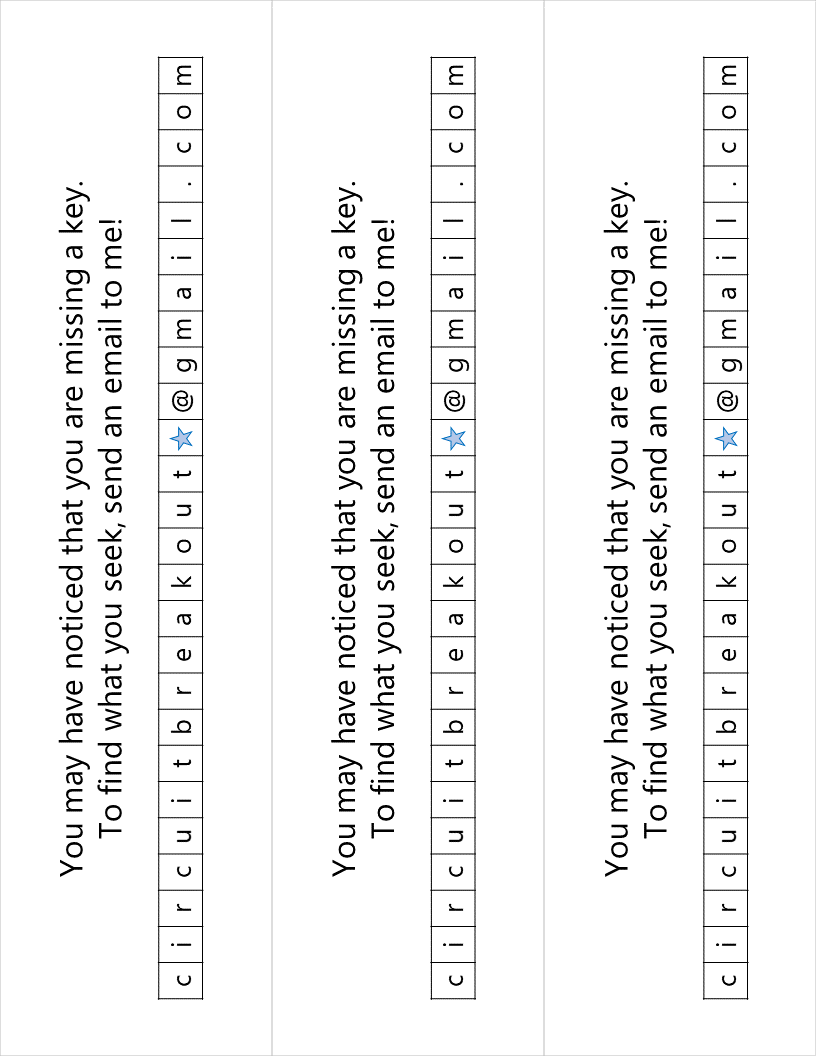
Lock #5 - Keyed Masterlock #1
I knew going into this task that I wanted to make something that I could use over and over without a huge reset between class periods. Because of this, I chose to print out all of the clues on card stock and laminate everything with my handy thermal laminator. Of course, it would work just fine on regular paper as well. Just be prepared to have sets of clues to refill the boxes if you are doing this for multiple classes in a row. I wouldn't expect that you will be able to reuse any of the printouts from class to class because it's almost guaranteed that someone will write on them even if instructed not to. This was another great benefit of the lamination because students were able to write on the clues with a dry erase marker and wipe it clean at the end of class. Printing out the CluesHere are the files in pdf and powerpoint formats organizes by clue groups. A couple things to keep in mind:
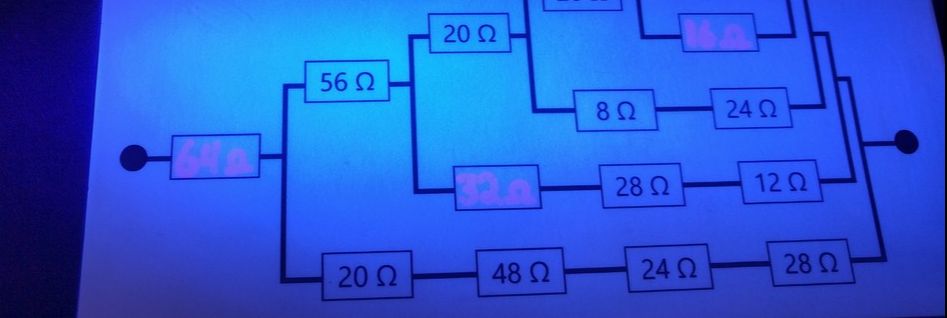
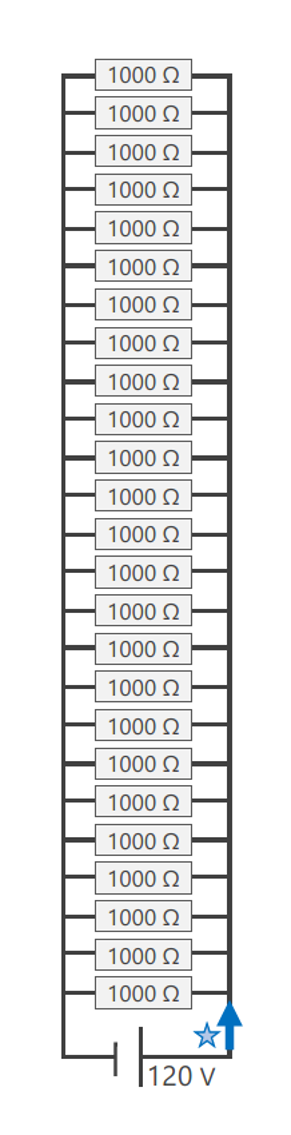
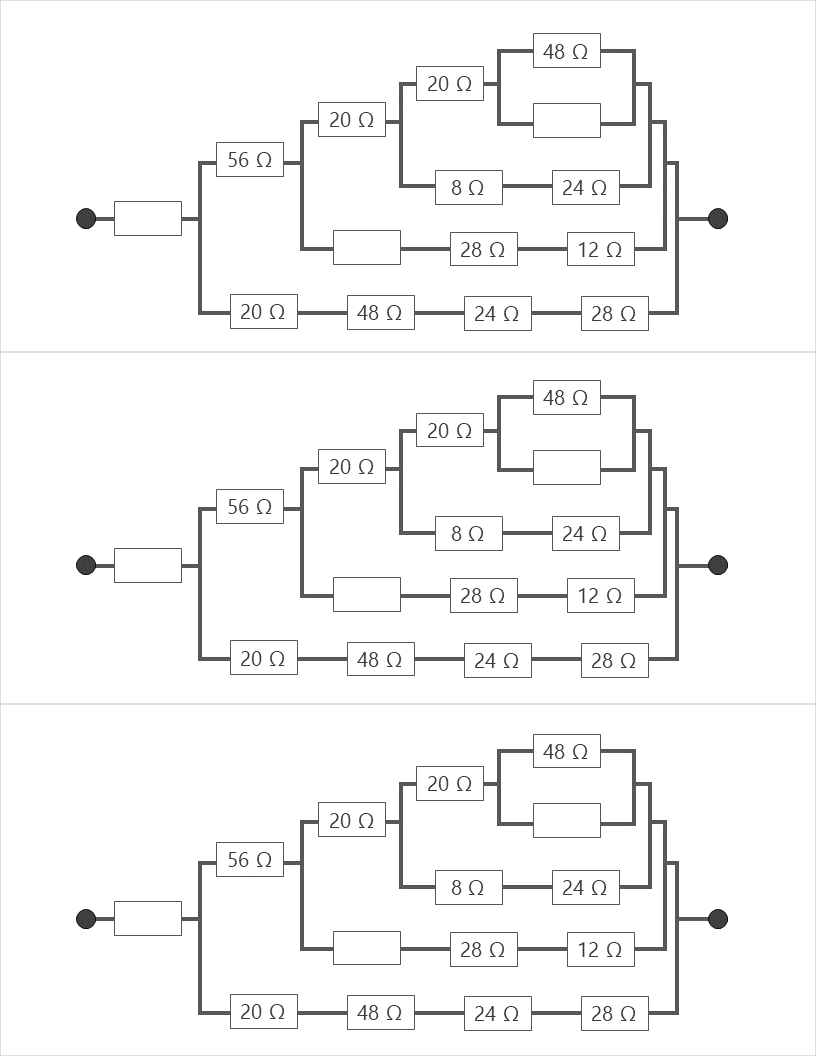
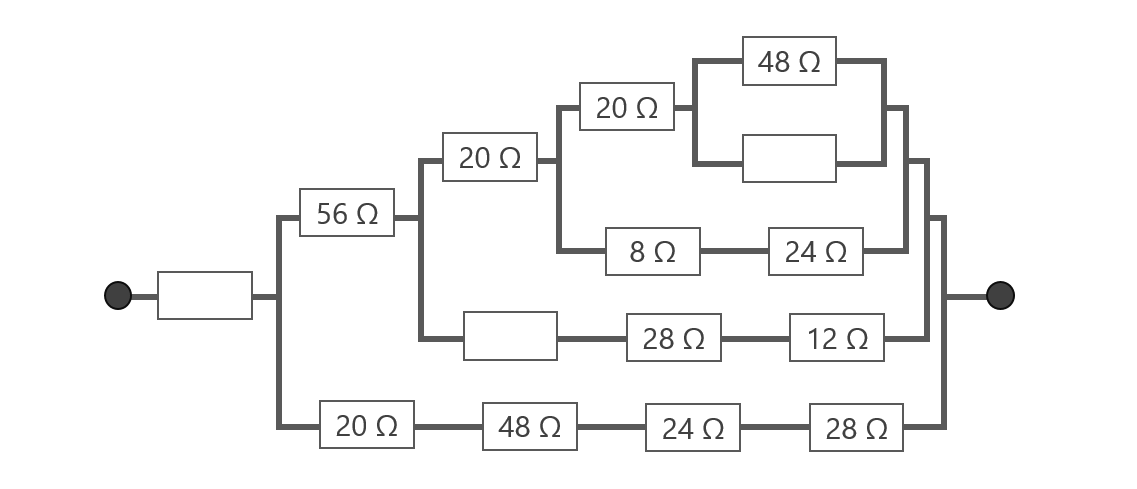
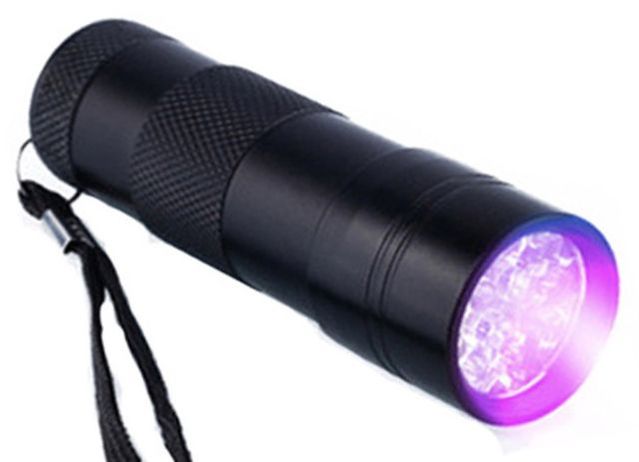
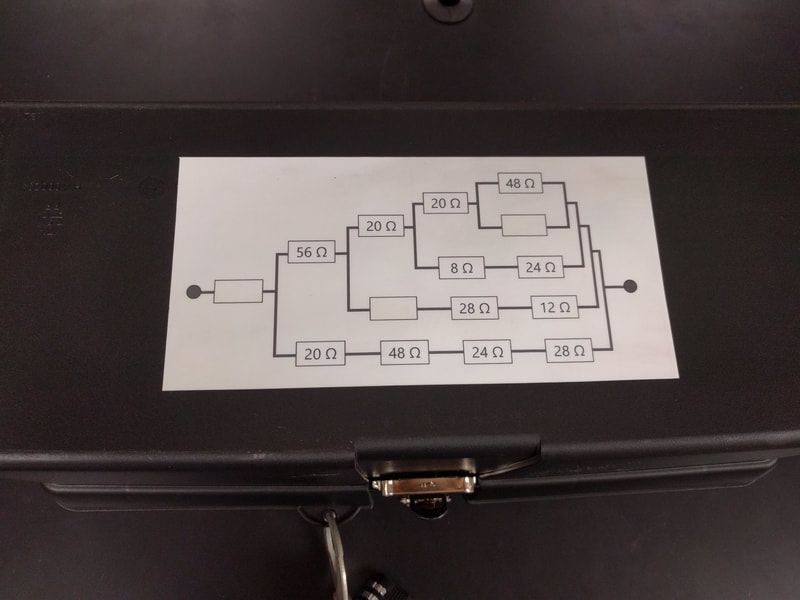
Once you have everything printed out, you will need to do one last thing to make sure that clues are ready to go. Clue 4 requires a little Invisible Ink that students will be able to reveal using the Ultraviolet flashlight. You will need to use an Invisible Ink UV marker to fill in the missing resistors by hand as shown in the picture below
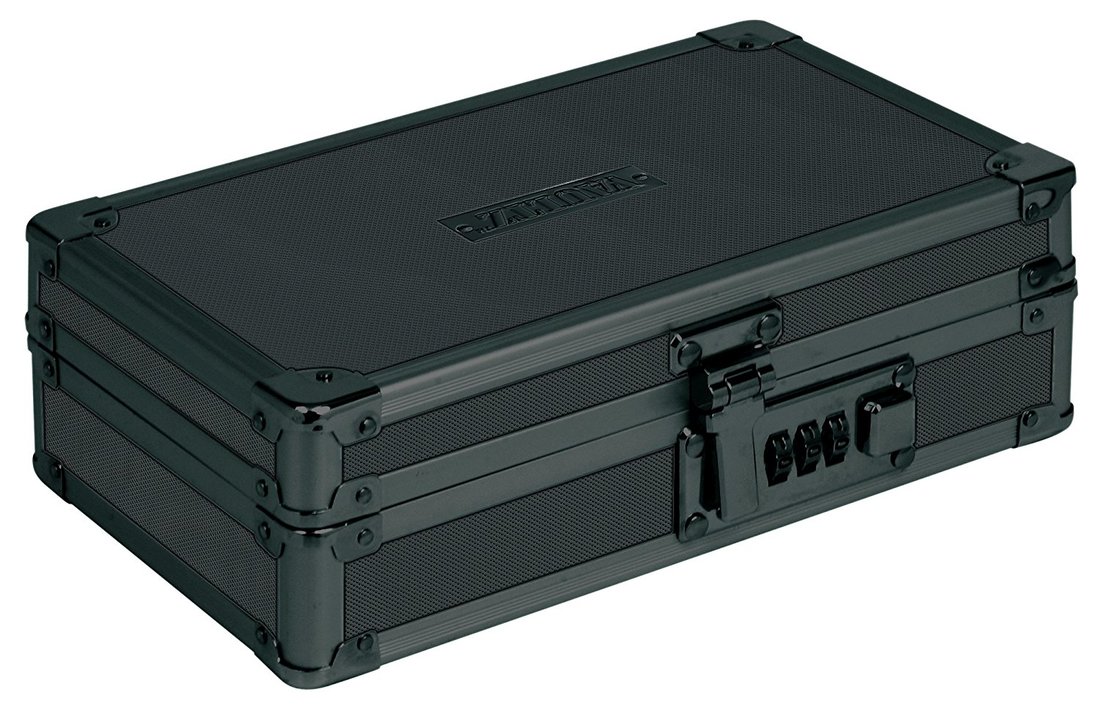
Setting up the Breakout BoxAll of the components required are part of the official BreakoutEDU kit that you can purchase for ~$150 from their website. If that pricetag is hard to swallow, I have written up some more information about building your own breakout kit sourcing from Amazon. In my blog post, I outline how I made 9 kits for under $70 per kit. 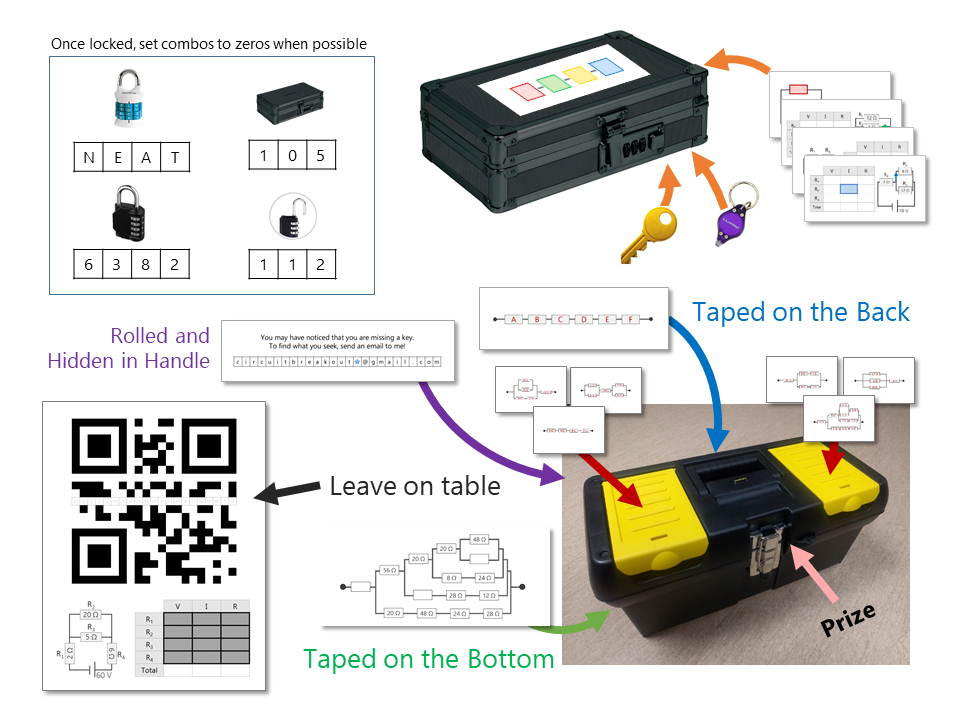 Inside the Big Box:
Outside the Big Box:
Inside the Small Box:
Outside the Small Box:
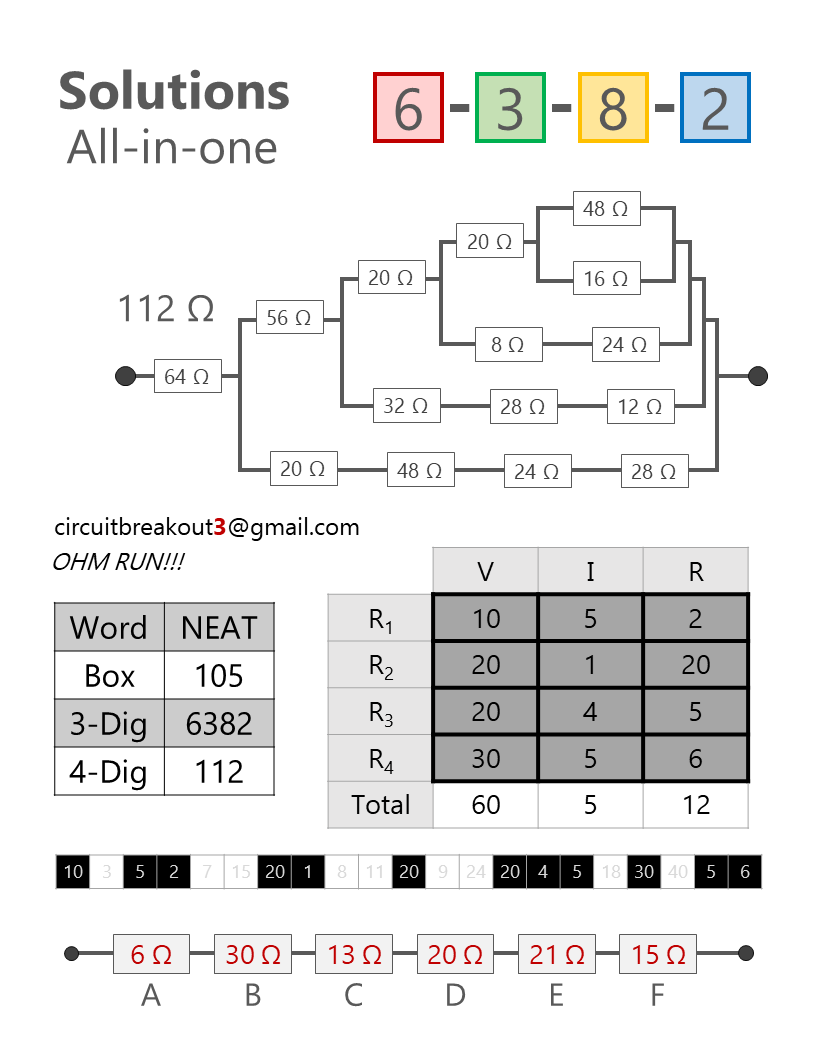
Set your Locks:
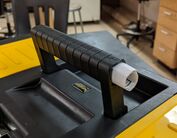
Lock it Down: Use the Lockout hasp to lock the big box with Work Lock, 4-Digit Numlock, 3-Digit Numlock, and keyed Masterlocks Time to Escape!What my students loves most about this activity was that I didn't give them any guidance or instructions. I'm pretty sure all that I said was: "There is a prize for your group inside the big box on your table. You must work together to solve the clues and get inside" Please leave a comment or contact me directly if you have any questions about this activity or setting up your own breakout box escape room activity. I'm excited to continue adding more in the future so I can get some more value out of these kits! Resetting the Box
FilesDownload an outline of this task (essentially a printer friendly version of this blog post)
Click for more breakout tasks
Comments
|

Joe CossetteFather, Physics Teacher, Knowles Fellow, Friend, Techie, and Musician Blog Posts |
||||||||||||||||||||||||||||||||||||||||||||||||||||||||||||||||||||||||||||||||||||||||||||||||||||||||||||||


 RSS Feed
