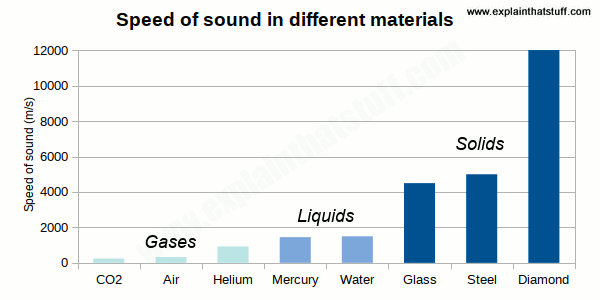
The Premise
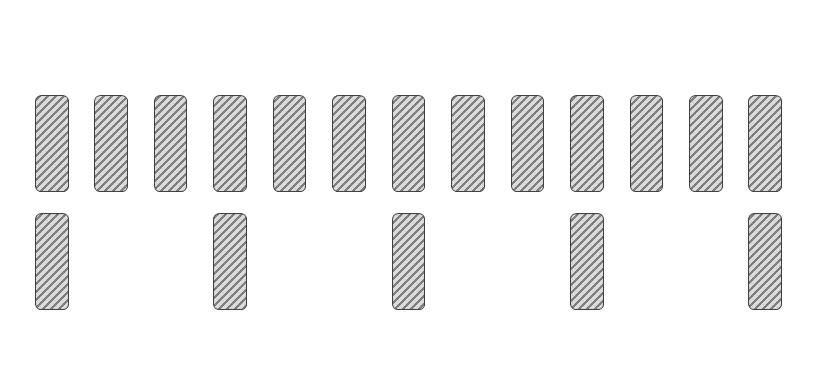
I wanted to provide students with some sort of hands on demonstration that helps them visualize and remember this relationship rather than just memorize that sound travels faster through steel than water. In this model, dominos are used to represent the spacing between molecules in a substance propagating a sound wave. Setting up the Dominos
Capturing the ResultIt all happens really fast and it's really hard to tell "who won" in real time. Because of this, I have students capture this in slow-mo on their phones or tablets and watch back the footage. Things to Keep in Mind:
Is this Model Perfect?No. As with almost every physical model representing a hard to visualize phenomenon, this model has more than it's fair share of limitations. I would argue however that at the high school level being able to relatively rank the speed of sound through a typical solid, liquid, and gas is about as much as students really need. To that end, I think this domino wave model provides a really nice experience for students to hook on to and remember. SimulationThere was a simulation of this concept posted on reddit (thanks to @UniverseAndMore for spotting it). It does a nice job of making this difference between solid/liquid/gas even clearer. 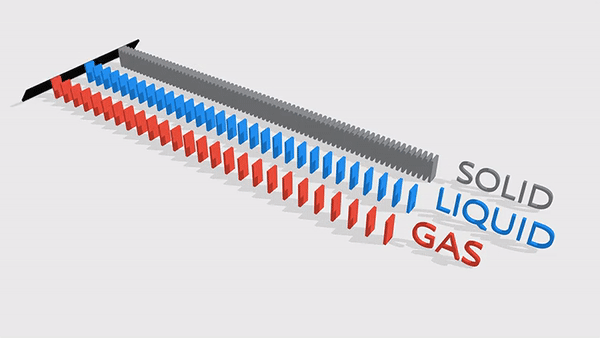 This post is part of larger collection of my favorite science demonstrations CLICK HERE FOR MORE DEMOSRelated LessonsClick for more Waves resources ⬇ 
Comments
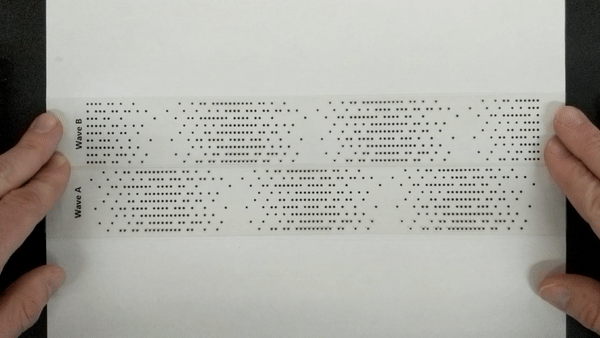
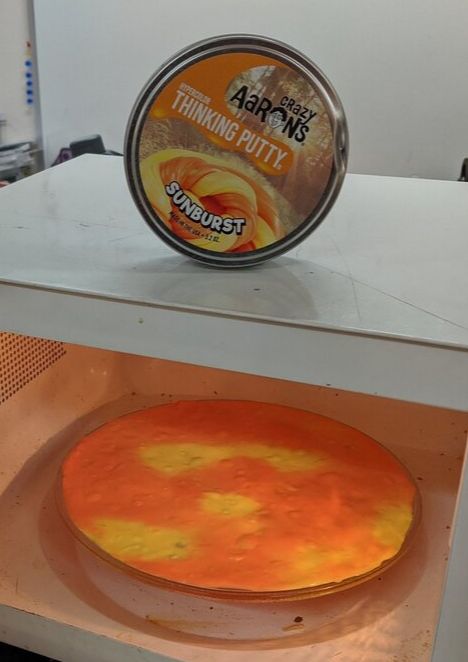
The PremiseOne of my favorite applications of standing waves and electromagnetic waves is a microwave oven. Using a pretty simple set up to locate the hot spots (antinodes of the standing microwaves), you can make some measurements to confirm the speed of light. Visualizing the Standing WavesSince we aren't able to see the standing waves occurring in real time, we need a way to find the hot spots. There are a variety of options that can work like a plate of chocolate chips, marshmallows, cheese, or old peeps (this video is the most underrated science video on youtube by the way). While I've had success with all of these options, I've had a hard time making them visibly obvious to a classroom full of students and I always struggle to get everything reset in time for the next class.
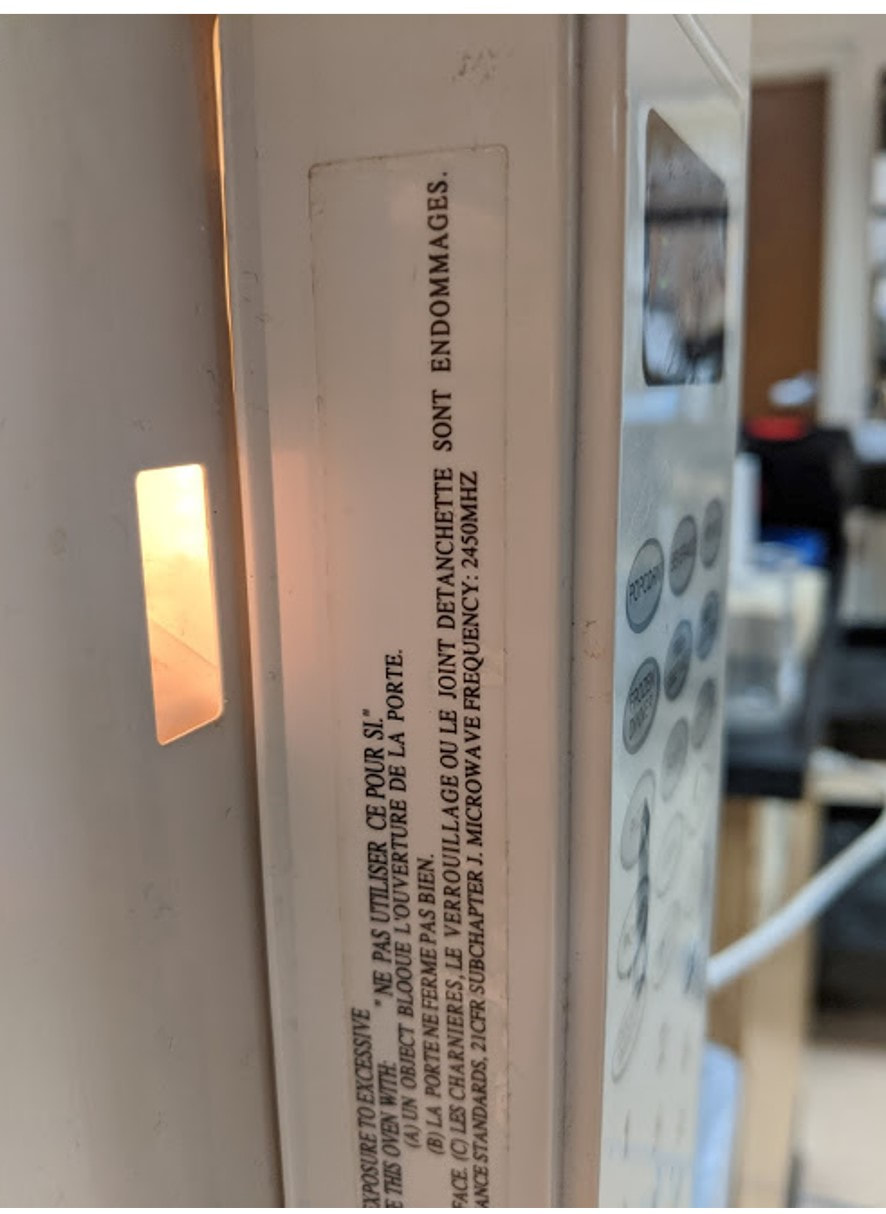
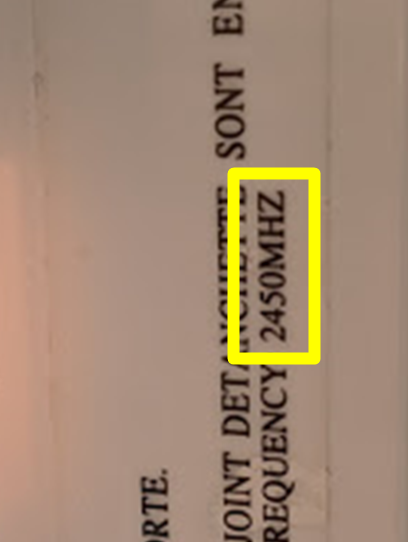
Collecting DataAll microwaves have a label (usually on the inside of the door) that includes the frequency specifications for the the magnetron inside. The "Microwave of Science" that I use in my classroom is rated at 2450 MHz (2,450,000,000 Hz)
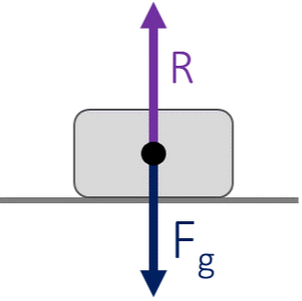
With this frequency and the speed of light, the wave speed equation can be used to calculate the wavelength of the microwaves. Each antinode in the standing wave will result in a hot spot so the hot spot spacing should be about half of the calculated wavelength. (see the slide below) 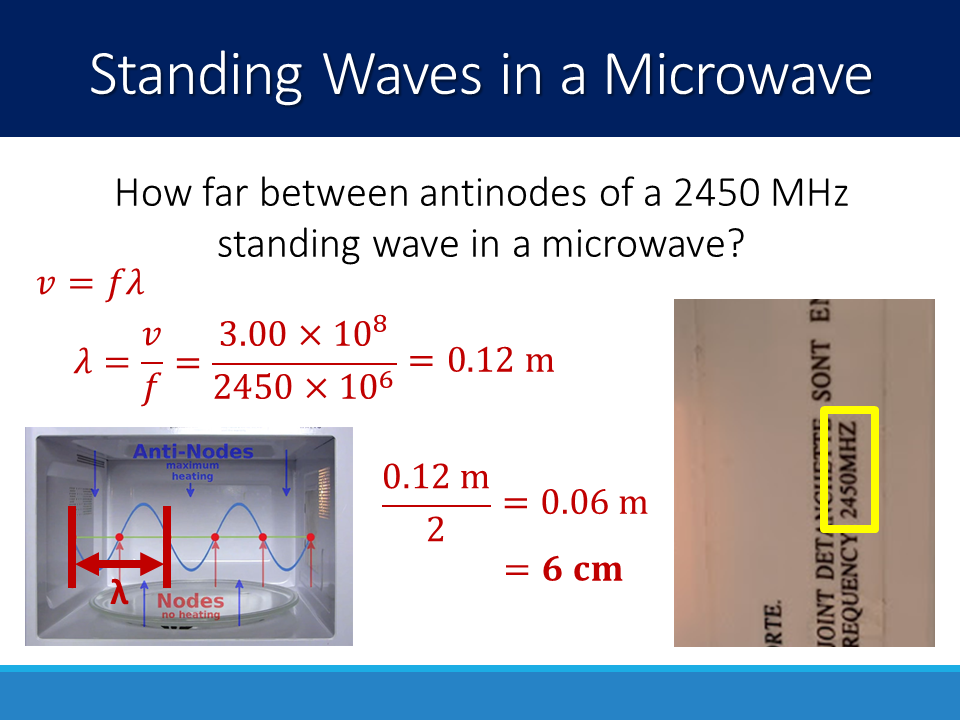 Once you calculate a predicted hot spot spacing, you can confirm the theory by measuring average the spacing between the visible hot spots in the thermal putty (or chocolate, marshmallows, etc). I have also done this process in reverse and used the spacing and frequency to "measure" the speed of light. I think I prefer ending with the putty measurement but it really depends on where you are at with your class and what your goals are. 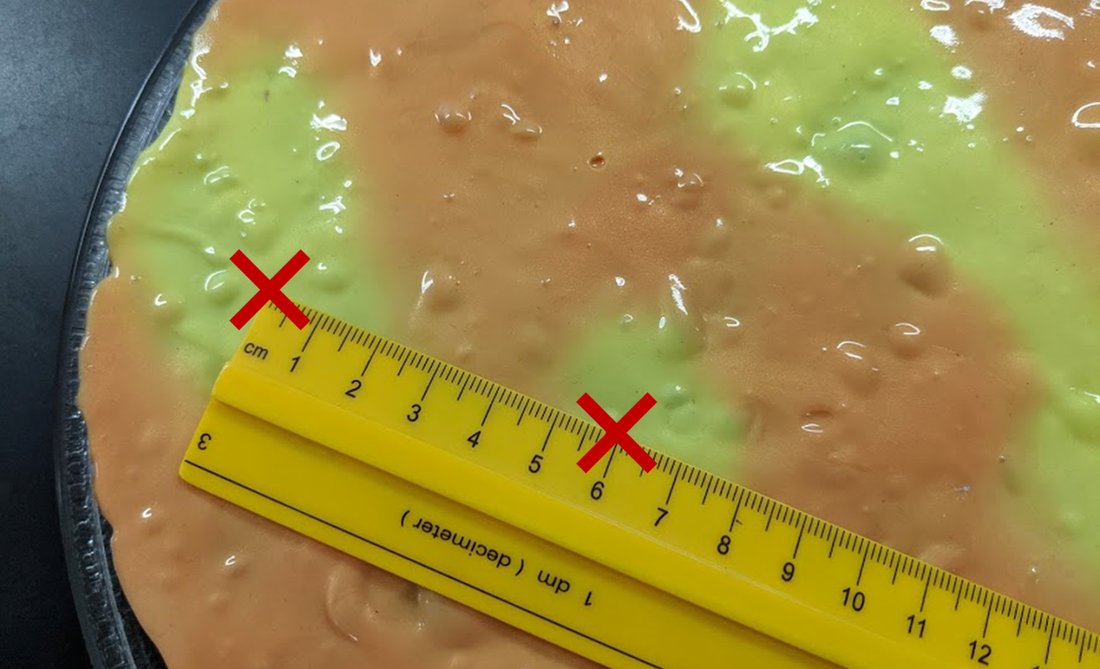 This post is part of larger collection of my favorite science demonstrations CLICK HERE FOR MORE DEMOSClick for more Waves resources ⬇ The PremiseSometime in the middle/end of our forces unit, my students walk into the room with electronic balances set out on every table. I start class by asking the simple question "What does an electronic balance (or bathroom scale) measure?" and have the students discuss in pairs or groups before bringing the discussion to the full class. Typically this results in a split between students that think the answer is "mass" and students that think the answer is "weight" so I ask them to use their balances to measure an object on their table (typically an eraser or ball of clay/playdough). Once they have recorded that result, I have them place the balance on a board and, while measuring the object as before, slowly tilt the surface in which the balance is sitting on. They will very quickly notice that the value displayed by the balance is going down! Obviously, the mass (and weight) of the object isn't changing when they simply angle the surface, so the electronic balance must actually be measuring something else. Enter the Normal Reaction Force :) What's Going On?If an object is sitting on a surface and it is not accelerating in the vertical direction than we know that vertical forces are canceling out.
Taking MeasurementsIt is possible to take measurements and show that the value changes as a cosine of the angle but it is important to use a few tricks for your procedure:
This post is part of a larger collection of my favorite science demonstrations CLICK HERE FOR MORE DEMOSClick for more Forces resources ⬇  The Premise
The general idea is that all surfaces flex when they impart a normal force but for rigid surfaces like a brick wall, it's impossible to see it by just staring at the wall when someone pushes. This demo uses a rod attached to the wall that rolls a small dowel to turn a mirror and deflect a laser point when the wall is pushed. It's a pretty cool set up to walk students through and makes for an awesome introduction to the topic that all students can see (and even try for themselves). Materials
SetupThere are several different ways that you could get this demo to work. In the video above, I used a wall and a table and in Marc's post, he uses a beam and a chair. Just make sure that the laser and mirror are on surfaces that are not attached to (and moving with) the wall that you are pushing on and you should be good to go. I also recommend playing around with your laser and mirror set up so that the laser point ends up in a place that the entire class can see. Even though this apparatus is in the corner of my classroom, the point that gets deflected is on the ceiling in the very middle of the room.  Discussion QuestionsI do this in my classroom as a full class introduction but there are still some opportunities for discussion in groups as we work through this demonstration.
ExtensionIf students really want to get into it, they can use the deflection of the laser, distance to the ceiling, and the radius of the dowel to calculate how much the wall actually moved ;) See this article for more details. CLICK HERE FOR MORE DEMOSClick for more Waves resources ⬇ 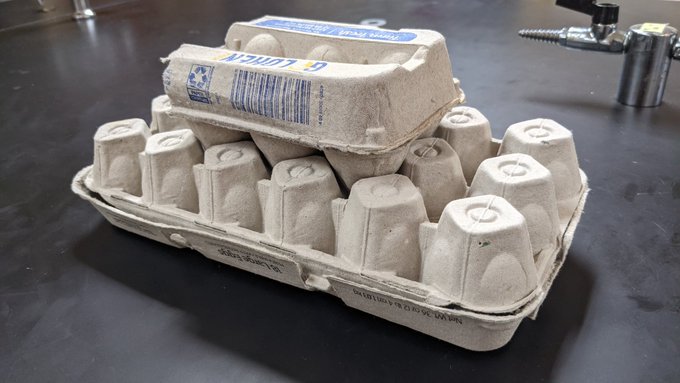
The Premise
The Set Up
The set up for this model is really cheap and easy so it's possible to use as a demo in the front of the class or a manipulative for each group in the room. Basically all you need is two empty egg cartons. I like one of them to be an 18-egg carton because it's wider and does a nice job of representing the table or the floor but this would work with two 6-egg cartons as well
The Model
When the object is at rest, the microscopic features of both surfaces "settle in" to each other kind of like the nesting of the two egg cartons. Overcoming this microscopic interlocking requires a certain amount of force but once the object has "risen above the grooves", as long as it keeps moving it is able to skirt along with less resistance than that initial scenario. This is analogous to static and dynamic/kinetic friction and is a nice conceptual starting point before collecting data and quantifying this properties with numbers.
CLICK HERE FOR MORE DEMOS!Click for more Forces resources ⬇
|

Joe CossetteFather, Physics Teacher, Knowles Fellow, Friend, Techie, and Musician Blog Posts |
||||||||||||||||||||||


 RSS Feed
